
Quick answer: Wall putty is a cement-based filler applied over plaster before painting. It fills small cracks and pores and gives a smooth base, so paint looks even and lasts longer. Mix it two parts putty to one part water and apply two thin coats. Keep the total thickness under 1.5mm, or it can crack and peel later.
The construction process is complex, as numerous activities must be completed correctly to produce excellent outcomes. Though construction usually takes less time, adding finishing to the building’s overall appearance will take more time. To enhance the great impact of finishing, different contractors use various products. Putty is one of the products that is frequently used in the construction process. It is a cement-like material with high plasticity, and normal people tend to believe it is similar to Plaster of Paris or clay. However, the putty material is not identical to any of them. In this blog, we will discuss the use of putty in construction and all the essential things one must know regarding putty work for better construction of their house.
What is Putty in Construction?

Putty is commonly used in the construction industry as a filler and sealant. It is traditionally made by combining finely powdered chalk (sometimes called whiting) with linseed oil, kneaded properly to make the consistency of dough. Putty is available in many colors and can be painted once completely dried off.
Putty is highly plastic and is frequently used in traditional single glazing to seal glass panes into wooden frames. Before painting, walls can be given a smooth, damp-resistant surface using wall putty.
What is Wall Putty?
Wall putty is a cementitious material with high plasticity that looks similar to the clay texture. It offers a safe, smooth base for painting. It also serves as a filler because we can use it to fill any patches or cracks in the wall. Wall putty allows all types of colors to be applied over the walls. The benefit of wall putty is that it can be easily applied to interior and exterior surfaces, whether old or new.
Before painting any surface, two layers of putty are often used. The first coat fills in surface cracks and gaps, and the second coat ensures a smooth surface. Wall putty is used over different types of walls, such as dry, concrete, plaster, etc.
What are the Different Types of Wall Putty?

Various types of wall putties can be purchased in accordance with the need for its application. However, the two types of most used wall putties are as follows:
White Cement Based Wall Putty: The most popular type of wall putty is the white cement putty, white cement putty is prepared with fine white Cement, Polymer and Minerals. The find is that while cement white putty gives a very good binding property. Also, it gives a wet, fine, and slipperiness that makes it ideal for both interior and exterior walls. Also, the white cement prevents the wall from developing dampness and is best used for ornamental purposes. The white cement wall putty is strong since cement is the raw material that is used in preparing the putty.
Acrylic Wall Putty: This putty is water dispersed and contains white pigments, water soluble acrylic emulsion and some additives. The acrylic wall putty only applied to the inside surface of the wall. When used to fill in the holes on the walls, it again dries to a dull finish and makes the walls look smooth and plain. White cement putty has a higher binding property than the acrylic putty.
What are the Advantages of Wall Putty?
Some of the advantages of wall putty are as follows:
- It enhances the tensile capacity of the wall.
- Wall putty helps in increasing the durability of wall painting by improving the longevity time.
- Wall putty minimizes the amount of money that is used to paint the walls adding to the general cost of paints.
- Wall putty is a material which can resist moisture.
- It is useful when trying to achieve a more finished look on the walls.
- The wall putty does not peel off or require much abrasion to get off the wall.
- It also provides the walls with a wet flat and appealing look that reveals the real hue of the paint.
What are the Disadvantages of Wall Putty?

There are a few disadvantages of wall putty:
- In fact, once it has become hard, it is not viable to employ wall putty paste.
- For the expected finish, skilled labor is needed to apply the wall putty and it is highly recommended that the labor be trained.
- As mixing wall putty by hand is time consuming and the material gets dry fast this process calls for a mechanical method.
How to Apply Putty on Walls?

The steps for applying putty on the walls are as follows:
- First of all, it is necessary to learn whether the surface is cemented or plastered and, secondly, it is necessary to make sure the coated surface of the wall is cleaned and there are no minuscule debris or dust particles.
- The wall surface must be free of grease, oil or leakage. Wash the wall surface and allow it to dry with water and allow it to dry till it develops a damp sensations. Keep the wall surface dry.
- According to the manufacturer’s instructions, mix the putty with the necessary amount of water in a 2:1 ratio and imbibate with the mixing tool for 10 to 15 minutes.
- As you mix it, there should be no lumps in the mixture before putting it in to bake. When the mixture is prepared, then the mixture should look like pasty paste and smooth. The texture should be produced considering the fact that it is going to be used in the subsequent 2-3 hours.
- Before putting the putty on you must first put one layer of primer and allow it to dry for 12-24 hours. There are manufacturers who suggest the use of primer and there are those who do not suggest the use of primer depending on the ingredients of the putty.
- The first layer of putty should go on starting from the base of the wall to the top and it is advised to have an eight to six hours dry time on the first coat.
- Then, kindly use sandpaper to scrape out any particles remaining before applying a second coat of putty in a similar process with emphasis on allowing the second coat of putty to dry for about 6 to 8 hours.
- The thickness of the wall putty should not exceed 1.5mm as anything beyond this will lead to formation of cracks, peeling off in future and generally, it will take longer time to dry. The drying time of the wall putty also depends on the damped and clime states, etc.
What are the Tools Used for Wall Putty?
- Bucket: A bucket is needed when mixing putty and water so that it would be easier in pouring and mixing.
- Mixing Tool: Putty dries more quickly; thus, a mechanical mixing tool saves time and helps to avoid lumps in cement paste.
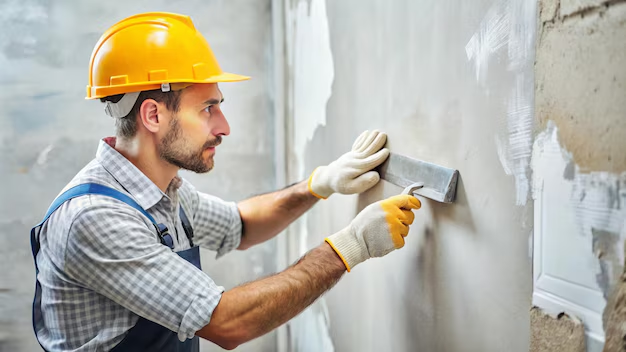
- Wall Putty Blade: This tool is used to apply and to spread the putty in equal manner on the walls. As a result the surface will be smooth.
- Sandpaper: After this, the putty is allowed to dry up fully before the surface is sanded with sandpaper to ensure that none particles and uneven surface patches remain.
How to Mix Wall Putty?
It’s relatively easy to mix wall putty. A bucket and some water are required to produce wall putty paste. Two parts of wall putty and one part of water are required because the mixing ratio must be 2:1. After that, stir those materials thoroughly. As the wall putty paste is made, we can apply the putty with a flat tool.
Do We Need to Put a Primer After Wall Putty?

There are different opinions regarding this answer. Many people think that the surface where we will work must be cleaned first. After that, it is suggested to apply primer to the surface. After this step, one should apply the wall putty.
However, the use of primer is optional after applying wall putty. Primer is utilized to ensure that the paint has a stable base for proper adhesion. It is optional to put a primer on a surface before painting as the wall putty already creates a surface ideal for painting.
Are Wall Putty and Plaster the Same?
Wall putty is used to fill the pores in walls and ceilings. Putty can be easily and quickly applied for minor work using a spray or brush. In contrast, plaster is a whitish powder that, when mixed with water, hardens into a material that may be used to make sculptures and casts and added to lime plasters to create casts for broken limbs.
Conclusion
The best quality of your living can be enhanced with the best possible construction standard. From that perspective, choosing the right wall putty can be important in constructing your dream home.
As you know, wall putty is essential for highlighting the elegance and flawlessness of your wall painting. You should now be able to achieve that seamless appeal just by connecting with India’s no 1 tech-enabled construction company, Walls and Dreams.
We provide the necessary tools and expertise to meet your painting requirements for residential and commercial properties.
If you are choosing between materials, read how white cement and wall putty differ. For the finishing steps that follow, see how to apply white cement to walls and our home painting tips. Putty will not fix a wall that is wet from inside, so check how to solve dampness in a wall first. For repainting or finishing work on an existing home, see our renovation service.
Frequently asked questions
What is wall putty used for?
Wall putty is used to fill small cracks, pores and patches on plaster or concrete before painting. It gives a smooth, even surface so the paint shows its true colour and the finish lasts longer.
How many coats of putty are needed before painting?
Two coats are usual. The first coat fills cracks and gaps, and the second coat gives a smooth surface. Allow the first coat to dry for about eight to six hours and sand lightly before the second coat.
What is the mixing ratio for wall putty?
Mix two parts putty with one part water, a 2:1 ratio, as per the manufacturer instructions. Stir for 10 to 15 minutes until there are no lumps, and use the mix within 2-3 hours.
How thick should wall putty be?
Keep the putty layer no thicker than 1.5mm. A thicker layer can crack, peel off later and take longer to dry. Drying time also depends on damp and weather conditions.
Do I need primer with wall putty?
Opinions differ. Primer gives paint a stable base to stick to, and some manufacturers recommend it before putty while others do not, depending on the putty. Check the instructions on the pack you are using.
Is wall putty the same as plaster?
No. Wall putty is a thin filler for pores and minor patches on walls and ceilings. Plaster is a whitish powder that hardens when mixed with water and is a different material used for different work.